If you find that you create the same layout and controls on multiple forms, you should consider creating a template part that can be reused over and over again. This is also valuable if you are a member of team that creates a variety of forms including ones that include similar elements such as the header plus controls to collect employee information such as [Employee Name], [Job Title], [Department], [Email], and [Location]. One person on the HR team can create the layout and controls, save it as a template part and then allow anyone on the team to use it in their forms, thereby reducing significant time and potential errors.
There are three major steps in creating the Template Part:
Step A: Create and save the Template Part.
Step B: Add the Template Part as a custom control to your form. [Skip to this step]
Step C: Place the Template Part in your form. [Skip to this step]
Step A: Create and save the Template Part
- Launch InfoPath 2007.
-
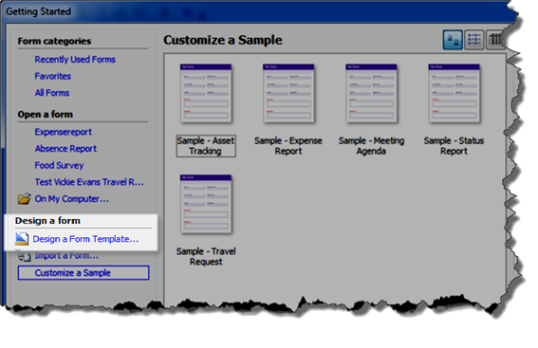
In the Getting Started window, choose Design a Form Template… from the Design a Form section.
-
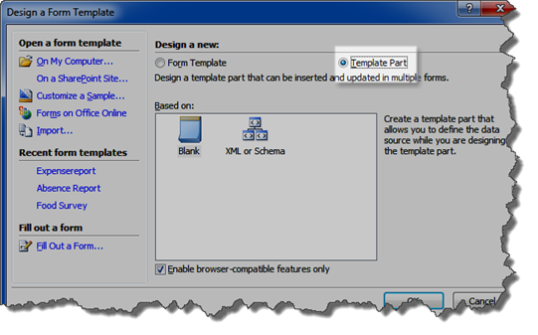
In the Design a Form Template window, select Template Part under Design a new: and click OK.
-
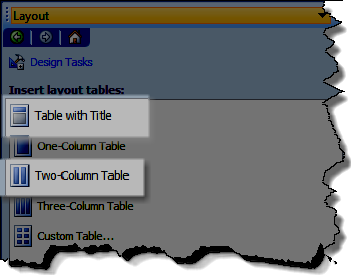
Notice the title bar. It should say (Template Part Design) TemplateGroup1. If so, click Layout on the Design Tasks task pane.

-
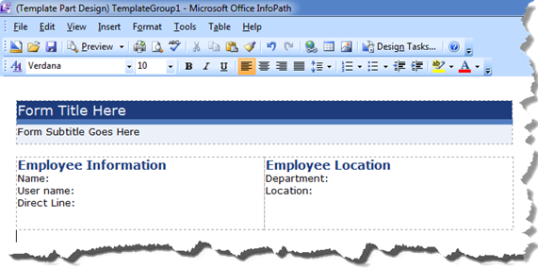
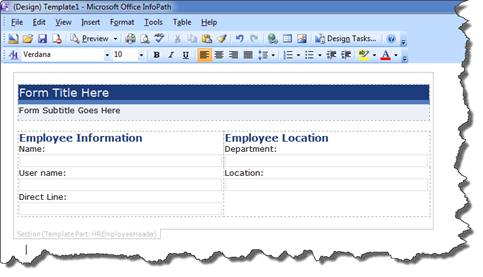
For this example, add Table with Title for our form title and then Two-Column Table for our employee controls.
-
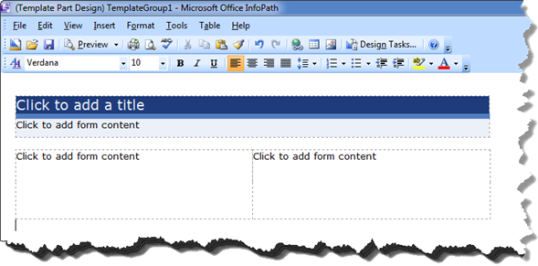
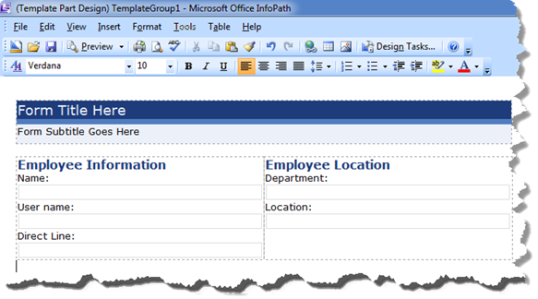
Your form should now look like this:
-
Type your information into the tables and format your text:
-
Insert your controls to match the data you need.
-
Don’t forget to update the properties of each control to include the control’s name. To do this, right-click the control that applies to the employee name and choose Text Box Properties. Change the Field name: property to employeename and click Ok. Give each one of the controls a unique and relevant name.

-
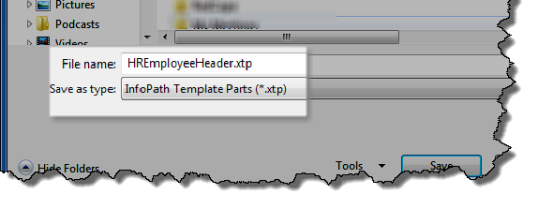
Once you complete the setup process, it’s time to save it to a shared location for others to use. In this example, I saved the template part as HREmployeeHeader with the default xtp extension. Be sure to post the file in a location where your team members can access it as well. This concludes Step A.
Step B: Add the Template Part as a custom control to your form.
- Open a new form template or open existing form template to which you’d like to add the Template Part.
-
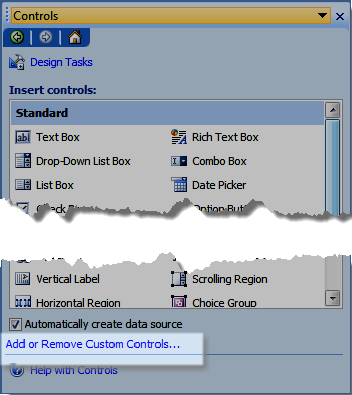
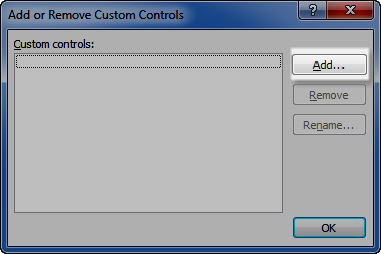
In the Task Pane, click the Controls link. Towards the bottom of the Controls task pane there is a link Add or Remove Custom Controls. Click that link.
-
In the Add or Remove Custom Controls window, click Add.
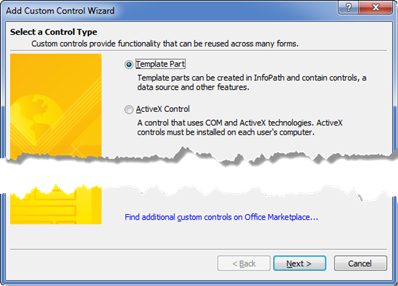
-
Click Template Part and then click Next
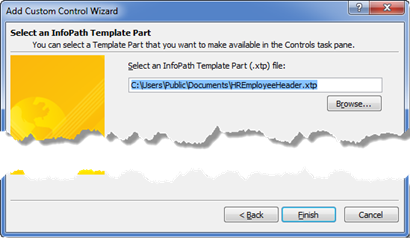
-
Browse to navigate to the location of your saved Template Part and click Finish.
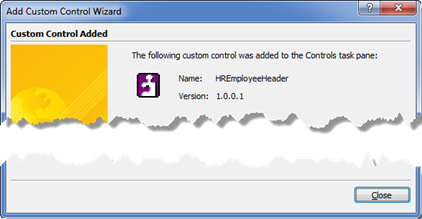
-
You’ll receive confirmation of the added part. Click Close.
-
You can add more Template Parts at this point. If you don’t have any more Templates to add, then click Ok.

-
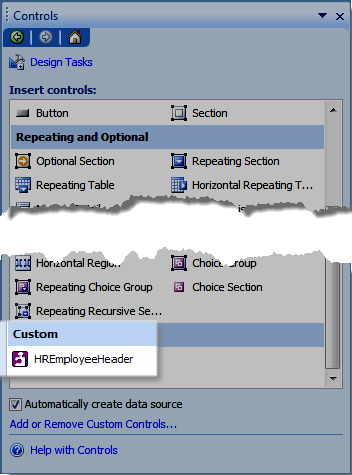
You should see the new Template Part in the Custom section of you Controls task pane. This completes Step B.
Step C: Place the Template Part in your form.
- Once you see the Template Part listed in your Controls task pane under the Custom section, you can add it to your form by simply clicking once on the name of the Template Part in the task pane. Notice the Template Part gets placed in its own Section.
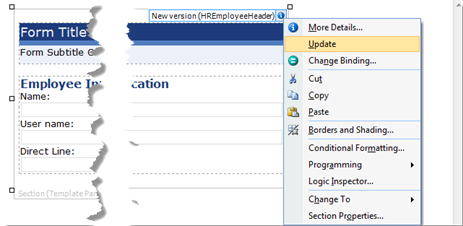
Note: If your Template Part needs to be modified go ahead and make the changes and save it. The next step is to remove the Template Part control from the Task Pane of the form that is using the Template and add it back. The old control in your form will have an icon in the top right hand corner of your table indicating a new version of the template is available. Right click the “section” (versus the icon) and choose Update.
Additional Resources:
- Video Tutorial from Microsoft: This video includes steps for refreshing the imported Template Part control when the Template Part is modified.
- Article by Itay Shakury: Get the current user without writing code. Want to save even more time? Create a reusable Template Part (in Step A above) that automatically populates the employee’s information in the form!
- Article from Microsoft: How to article and more details about what can and cannot be used in a Template Part.